
Send and receive files securely over the internet
Presentation of the free and open source software Syncthing, allowing peer-to-peer file synchronization and its possible uses for videographers and photographers.
It is available on Windows, Linux, macOS as well as Android at this link: https://syncthing.net/
As always, a full list of the articles in this blog can be found HERE.
Interface overview
Once installed and launched, the software will open a command window indicating the status of the connections as well as the application settings. If this command window is closed, Syncthing will shutdown and synchronization will stop.
In addition, Syncthing will open a tab in the system's default browser, to open the GUI. This tab can be closed once configuration is complete and the software will continue to operate in the background.
This user interface can be secured by a username and password which will be requested each time the software is started, useful if the computer is shared or is not secure.
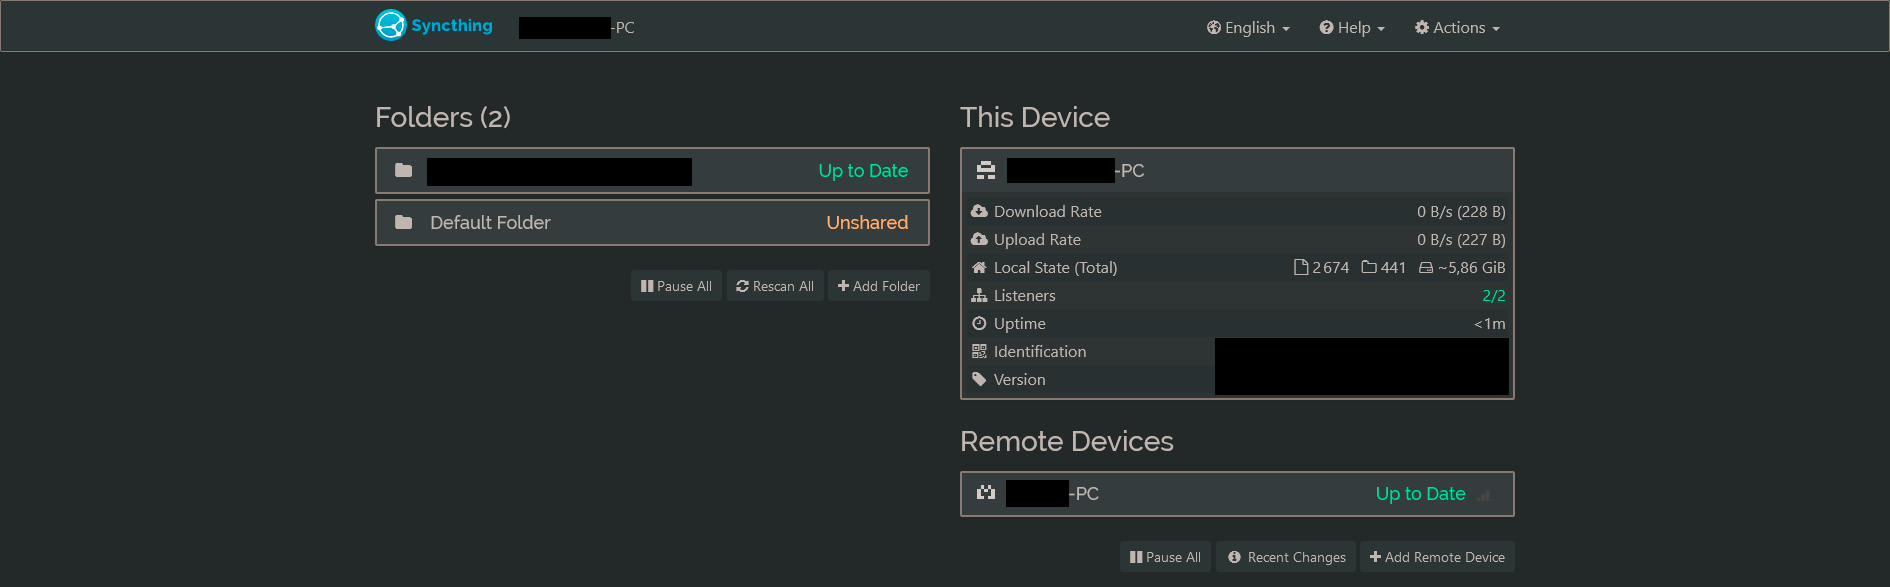
The GUI presents the different shared folders, information on the local state of synchronization and network data, as well as information on connected remote devices.
Connecting to another device
Sharing IDs
The first step is to connect both device with which you wish to send or synchronize data.
The two devices must send each other their IDs and save them for the connection to be possible.
Syncthing is a software designed for secure use, so no data will be exchanged without the target device having accepted the ID and folder share.
This ID can be found in the Actions tab then Show my ID. A code like XXXXXXXX-XXXXXXXX-XXXXXXXX-XXXXXXXX-XXXXXXXX-XXXXXXXX-XXXXXXXX-XXXXXXXX will be displayed in the upper window. It is this code that must be shared between the two machines to establish the connection.
The QRCode can be used for this purpose, as can sending the code by email, SMS or any other means of sharing.

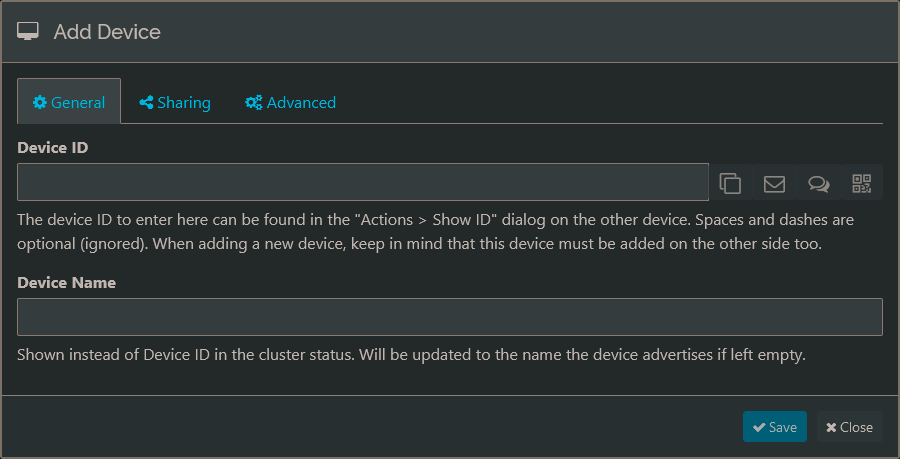
On each device: click on Add device. The window that opens allows you to enter the ID shared previously, as well as a nickname.
The second tab “Sharing” shows all folders available for sharing. If none are available, it will be possible to create them later.
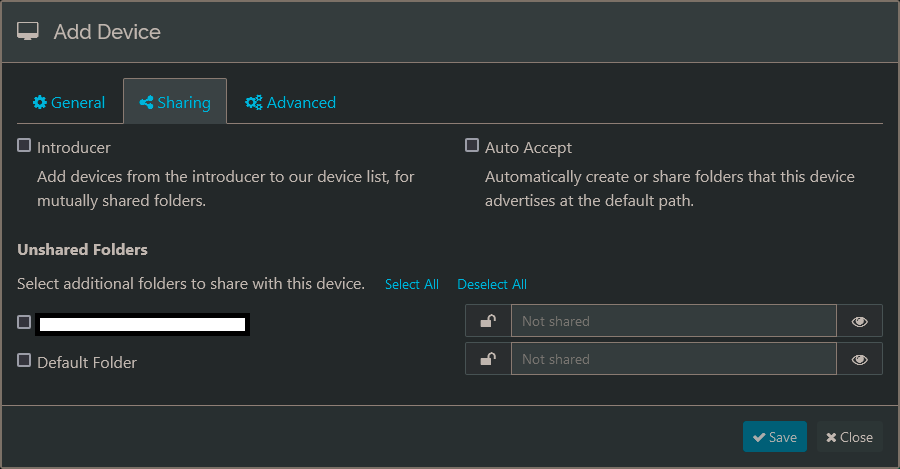
The last "Advanced" tab contains connection information between the two devices, such as connection settings, data rate limits as well as a potentially useful option if the machine on which the data is synchronized is not secure: "Untrusted".
With this option, the data will be encrypted and unreadable on the remote station without the password being entered.

Connection settings
The two devices now know which Identifier to connect to, but they still need to be able to communicate whether via the local network or the Internet.
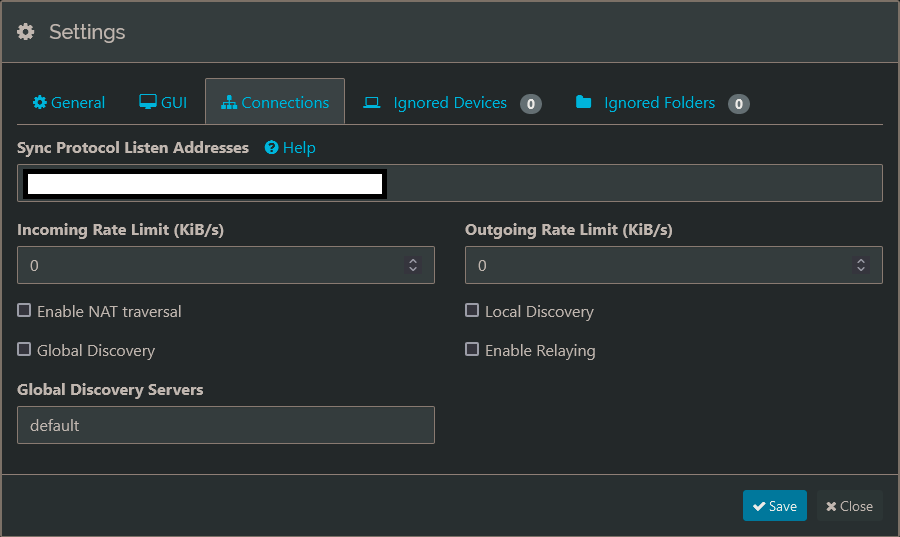
By default, Syncthing offers several automatic ways to connect. These options are available in the Actions > Configuration > Connections tab:
- Local discovery: allows you to connect two devices via local network
- Global discovery: allows you to connect two devices via the internet. To do this, the identifiers of each station will be sent encrypted to a common server in order to establish the connection. Please note that only the data necessary for the connection is sent to this server. More information in the Syncthing documentation here: https://docs.syncthing.net/users/security.html
- Enable Relaying: If global discovery connection is not possible, Syncthing will attempt to go through secondary relays. Be careful, the connection speed will be very significantly degraded by this option.
- Enable NAT Traversal: Allows Syncthing to connect more easily through routers and firewalls.
It is possible to deactivate all these options and directly connect the devices with their IP addresses for example, but this will be more complicated.
If the connection was successful, both devices should be visible in the Syncthing window under "Remote devices" with the connection status "Connected (Not in use)".
Syncing folders
Now to create the folders that will be shared between the two devices.
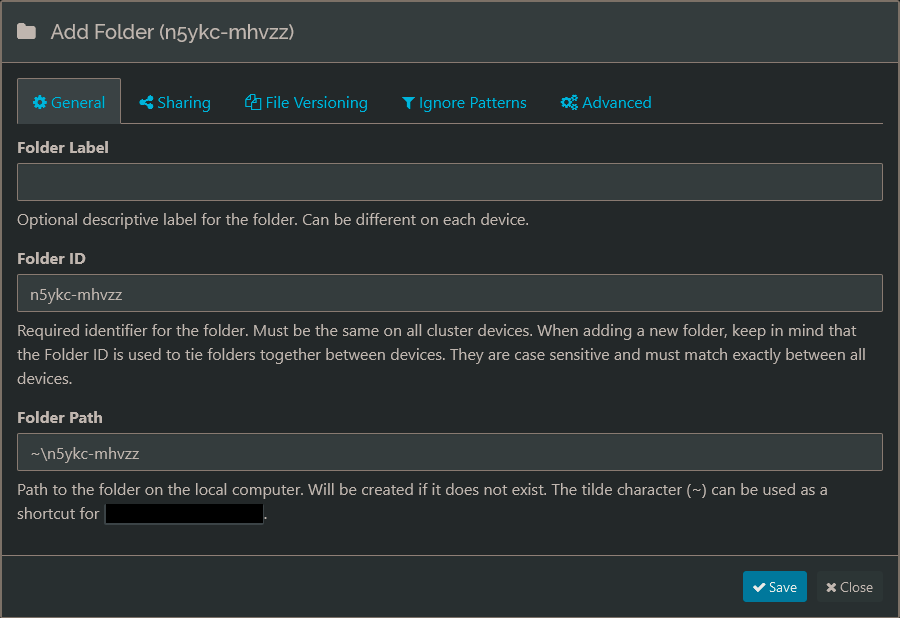
To do this, click on “Add Folder”: the name, identifier and local path to the folder to share must be entered (e.g.: C:\Documents\SharingFolder)
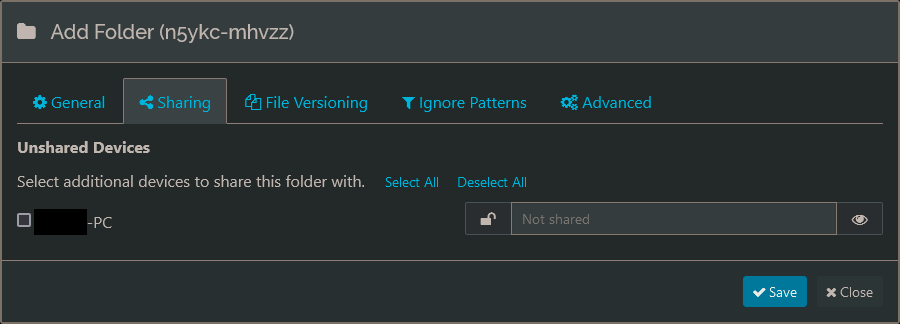
In the “Sharing” tab, you must select which device to share the file with.
The “File Versioning” tab dictates the management of files in the event of deletion or replacement with a newer version. The “Without” option does not make any backups, the “Trash style” option keeps the deleted version in a subfolder.
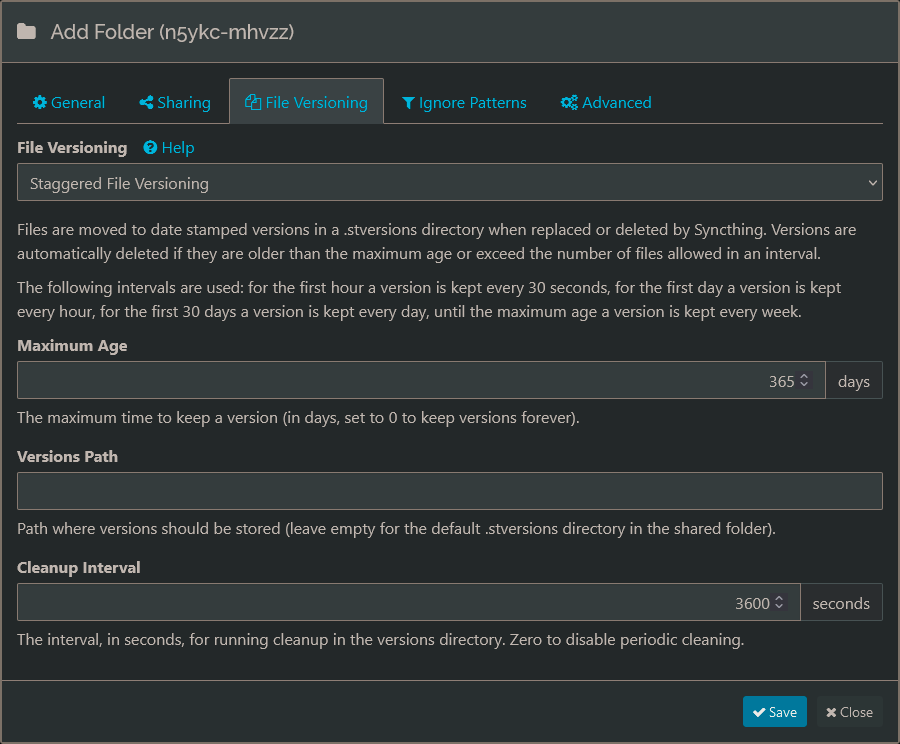
The most interesting option when wanting to synchronise small files and documents is “Staggered File Versioning”. It is for this option that I now prefer to use Syncthing compared to FreeFileSync previously presented in this blog (Article here).
With this, the software will keep several versions of the files over time: “during the first hour a version is kept every 30 seconds. The first day, one version per hour – versions from the first hour are then gradually erased until only the last one is left. For the past 30 days, one version per day – hourly versions of the first day are then gradually erased to keep only one per day. Beyond and up to the age limit, one version is kept per week – daily versions of the first month are then gradually erased to keep only one.»
Thus, if you have accidentally deleted or replaced a file several times, it will be possible to recover previous unchanged versions.
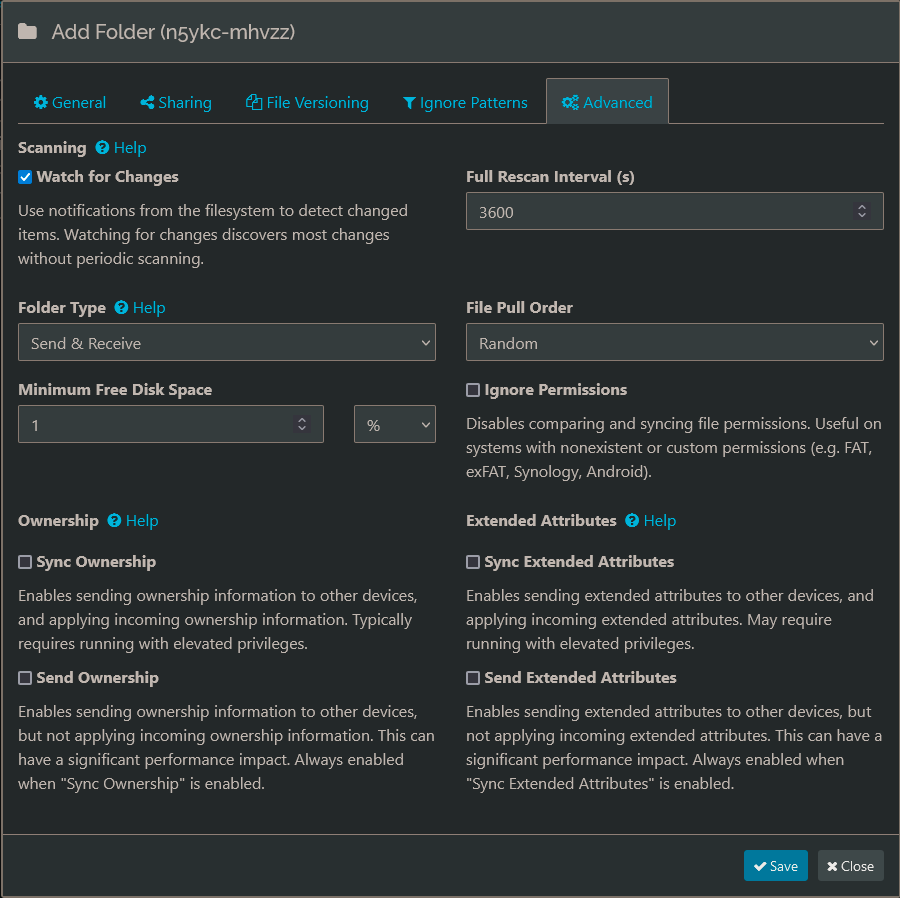
Finally, the “Advanced” tab is useful for selecting the folder sharing type. For simple synchronization, the basic “Send & Receive” option is ideal, but as detailed below, the “Send only” and “Receive only” options may be more suitable depending on the uses.
Once all these settings have been made, click on “Save”. On the other device a notification will appear requesting agreement to share the folder.
If accepted, the same configuration tabs will be opened for configuring the share on the other device. Each device will therefore have its own configuration.
Once completed, file sharing will be effective and synchronization will begin. Since Syncthing is peer-to-peer software, both stations must be turned on and connected to the network at the same time. The advantage of this method is that no third party or Cloud platform holds a copy of your data.
Sending rushes and large files to another device
Syncthing also allows to send and receive rushes securely and without intermediaries or data limits.
The configuration is identical to the folder sharing described above except for a few details:
In the “File Versioning” tab, I prefer to use the “Without” option so as not to end up with 10 versions of a 50GB rush.
In the “Advanced” tab, I set the device sending the data to “Send only” and the receiver to “Receive only”. So, if the person receiving the rushes deletes or moves the files, these changes will not be synchronized on my side, and will prevent me from losing the rushes as well.
Only changes on the sending side will be reflected to the receiver. If the recipient moves or modifies files, Syncthing will notice the difference and display the message “Local Additions”. This message does not prevent the synchronization of other files, but those modified or deleted will no longer be synchronized. An “Undo local changes” option will resynchronize all files between the two workstations, even modified ones.
The advantage of Syncthing in this use is that it manages connection losses well. If in the middle of the transfer of a 50GB rush the connection is lost, when restarted the software will not start over from the beginning of the file but from where the transfer stopped.
This type of synchronization can be used to transfer rushes directly from the shooting location to the post-production workstation, or to share the different shooting files between different devices.
The data is encrypted and therefore secure, while not depending on any Cloud services, subscriptions or third party actors.
Conclusion
Syncthing is capable of many more uses and configurations, so feel free to share your use of the software below.