
Workflow details
This is a post explaining step by step the way I found to post-process Sony RAW files in DaVinci Resolve.
As always, a full list of the articles in this blog can be found HERE.
Introduction
2024 Update: With the end of Capture One Express, I added a section on using the free RawTherapee software to convert .arw files and import them into DaVinci Resolve.
For Capture One Express, after inconsistencies in the rendering of images between Capture One and DaVinci Resolve, I realized that the settings of the Color Space Transform node was wrong. So I crossed out the wrong instructions and added the correct information, highlighted in red.
I recently tried to shoot the Milky Way and wanted to use the temporal noise reduction available in DaVinci Resolve. Temporal noise reduction use the same principles as exposure stacking, so I thought it be especially useful for astrophotography.
But I quickly found myself with a dilemma on my a7r2 while using the timelapse app, wanting to edit them in Resolve (yes I post process all my photos in DaVinci Resolve, more on that here).
If it is possible in standard photo mode to use the PP6 Slog2 Picture Profile even while shooting .jpeg; once the Timelapse app is launched, all the Picture Profiles are locked, allowing only the standard Image Styles, which are really lacking in dynamic range, even with the Portrait settings and -3 contrast.
The only other option is therefore to shoot in the proprietary Sony RAW format, the .arw. The problem is that it isn’t natively supported by DaVinci Resolve
Here are my choices:
- either shoot in .jpeg. While it will save space and can be easily edited inside of DaVinci Resolve as a .jpeg sequence, the dynamic range and noise performance is really limiting.
- or shoot in .arw and be able to unlock the full potentiel of the a7r2 sensor, but having to use another post-processing software without the tools available in Resolve.
Neither seemed acceptable to me, so I experimented to find a workflow to combine these two approaches.
Adobe DNG Converter OR Capture One Express
The solution is to transcode the RAWs in a format that DaVinci Resolve can open. Both .tiff and .dng are usable file extensions.
I first tried to use Adobe DNG converter, which is a free software and can convert the .arw to .dng but I found it somewhat limited in the resize options. You cannot specify a manual amount and are locked in arbitrary sizes, which is not ideal.
Then I tried Capture One Express, which is available freely granted you have a Sony camera. There, I chose the .tiff option as you can resize it at your will, while the .dng export resolution is locked at that of the original file. Resizing is very helpful especially for 42mpx files, which I downsize to a more comfortable 4K resolution, the same as my timeline in Resolve. I don’t know why resizing the .dng is not available in my Capture One version as it produces smaller file size than .tiff (30% approximatly).
Capture One also has the advantage of reading the metadata of the RAW file, so the color temperature and tint options are automatically applied to the file during debayering.
Workflow Step by step
So here is the workflow that I settled on:
1) RawTherapee
RawTherapee is a free, cross-platform RAW processing software. It is available at the following link: https://www.rawtherapee.com/
Once the software is open, simply import the .arw files you want to convert. The file browser tab is at the top left. The “Places” and “Recent Folders” windows on the left allow you to explore the computer’s file tree to access your images.

The main window shows all the image files present in the selected directory. To select them all, simply use the Ctrl + A command. By default, Rawtherapee applies a basic processing to RAW images called “Auto-matched Tone Curve”. The software reads the .jpeg file integrated into the RAW to get as close as possible to its rendering. If you want to avoid this, just use Right Click > Processing file operation > Apply > (Neutral). This profile does not apply any curves or modifications to the image after demosaicing.
RawTherapee is of course a complete RAW processing software, so you can make all the corrections and modifications you want before exporting the files. In my case, I prefer to work entirely in Resolve so I won't detail this use of the software.

All that remains is to export the files, to do this: select them, then Right Click > Put to queue. Then, go to the “Queue” tab located on the left of the screen. Pending files are all displayed. You can select the export folder, as well as the export format. DaVinci Resolve reads TIFF (16-bit) files correctly, so I chose that.
Once all the settings are correct, launch the export using the “Queue” slider, highlighted in red as seen below.

The files can now be imported into Resolve as seen in section 3) DaVinci Resolve, without the need to use a Color Space Transform node if the rendering is identical between RawTherapee and Resolve.
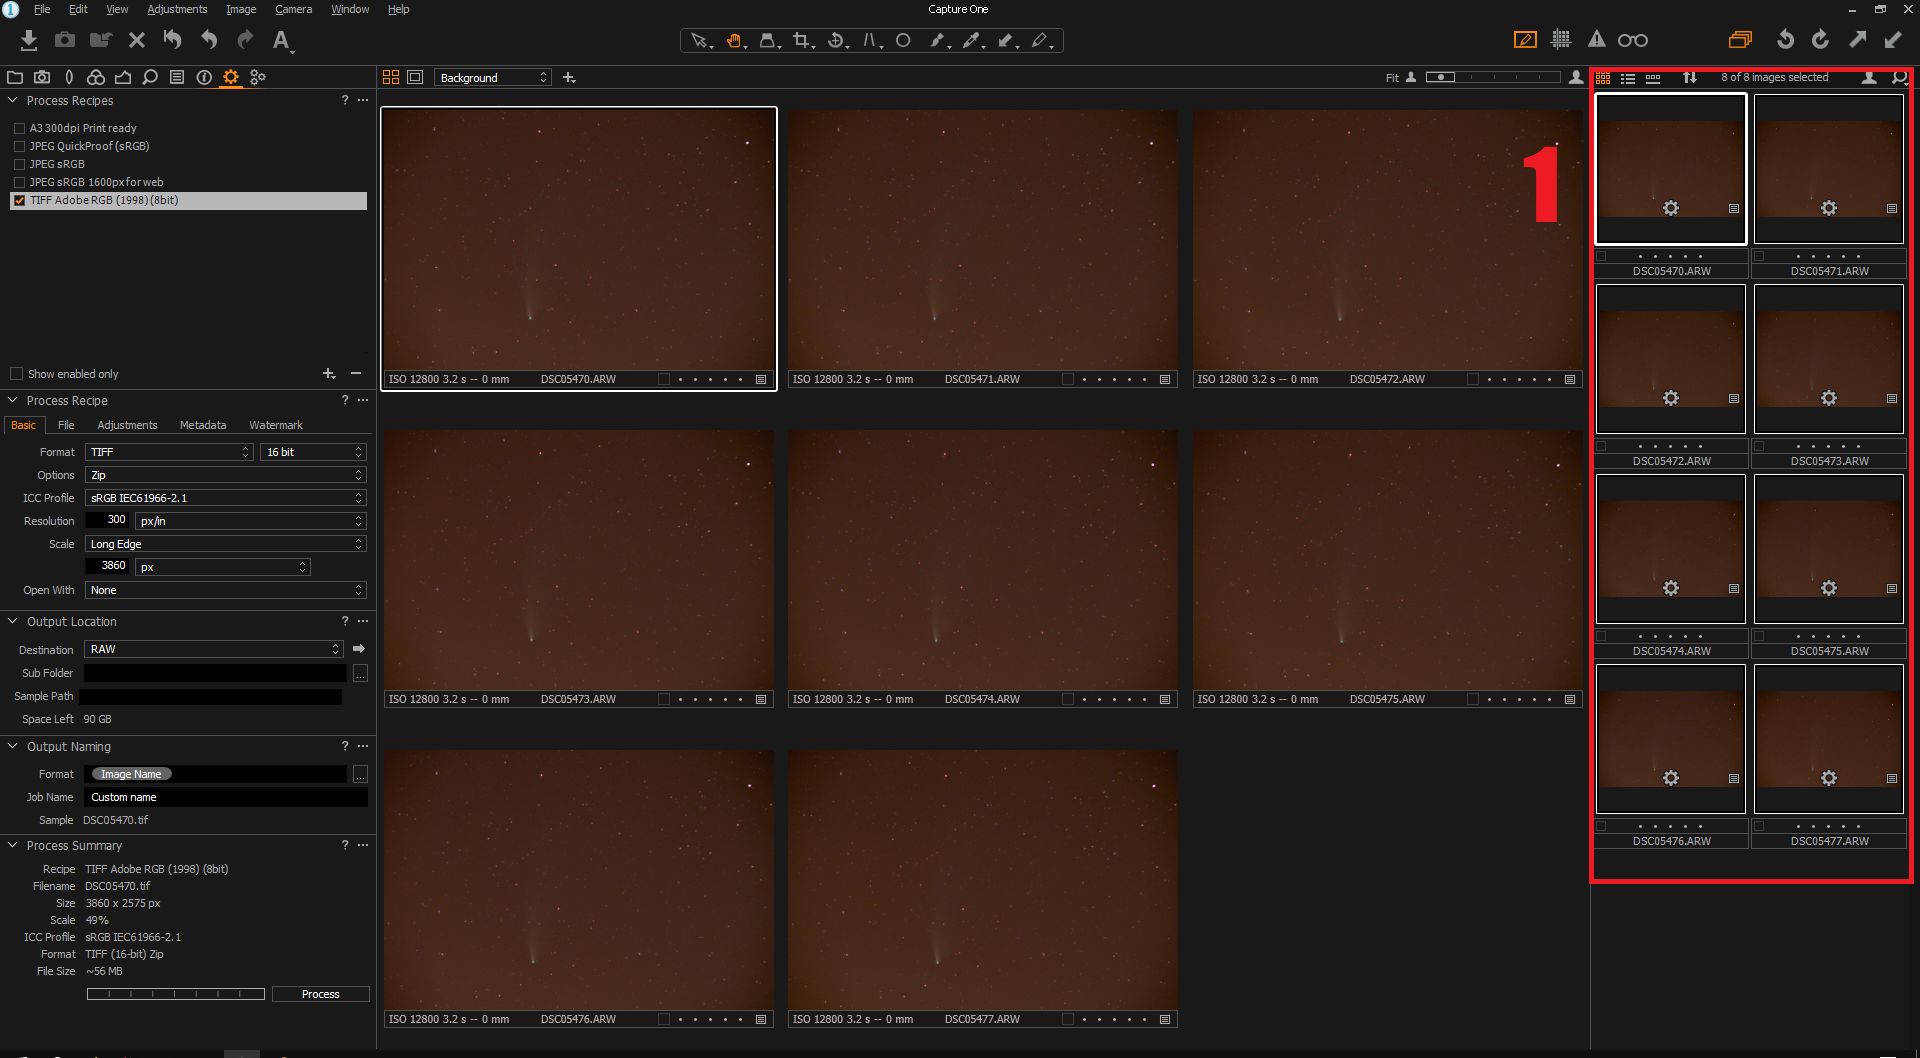
2) Capture One Express
First import the files that you want to convert into Capture One. For DaVinci Resolve to correctly read the .tiff file, you need to change the gamma to Linear. You need to change the curve setting to Linear Response. (Attention! Linear Response ne change pas le gamma en linéaire, c’est juste le réglage du rendu de Capture One qui n’ajoute pas de contraste ou de courbe lors du traitement des photos)
It is also possible to change white balance or any settings you like at this stage.

Then, you need to apply these corrections to all the other files. To do this, Ctrl+Shift+C to copy the adjustments, then after selecting all the other images, Ctrl+Shift+V to paste them.
Time to export the files. In the Output tab, select the .tiff format in 16bit (it is necessary with linear gamma to prevent banding and other artifacts). You can also resize the images if you want. Here, I chose to downsize to 4K (long edge at 3840px) to save space and go easy on my laptop.

Once the export options are set, select all the images and press Ctrl+D to start the processing.
3) DaVinci Resolve
In DaVinci Resolve, import the files as you would for any video file. Resolve will automaticaly treat sequentially numbered files as a video sequence. In my case it is useful as I can use the temporal noise reduction.
If you want to import the files individually, you can by clicking on the three dots then Show Individual Frames.

To process them in the Resolve Color page, in the first node add the OpenFX Color Space Transform tool (which is available in the free version I think) and use the settings as follows to convert the linear gamma to timeline gamma.:. The gamma of the exported photos is not Linear but sRGB, as shown in the ICC Profile box when exporting in Capture One. It is possible to choose the ICC profile you want, as long as it is available both in Capture One and in the Input Color Space list in the Color Space Transform node in Resolve.


Linear. sRGB (the image is incorrect, there should be sRGB both in Input Color Space and Input Gamma)
Then you can use Resolve as you like to process and color grade the image with all the additional tools it provides!
4) Final export
To export the finished image, in the Color tab, right click>Grab Still in the viewer. The image will be added at the timeline resolution in the Gallery tab.

Then, you can select all the stills you want to export by right-clicking>Export.

In the window that will open, at the bottom there is a scrolling menu where you can choose the file extension. I often use .png then convert them to .jpeg in another program, as the .jpeg exported from Resolve are not compressed and are too large for sharing and web content.
So this is the simple way to convert and process the Sony .arw files in DaVinci Resolve!
To finish: a small comparison between the noise before and after the Resolve temporal noise reduction plus spatial noise reduction applied:


Before: Single Frame – No Noise Reduction | After: 5 frames TNR + Spatial NR